
I recently set up Kubernetes in my homelab to build real operational experience, not just theoretical knowledge. My goal was to run something that behaves as close as possible to a production environment, similar to what you’d get with Amazon Elastic Kubernetes Service, while still keeping things lightweight and fully under my control.
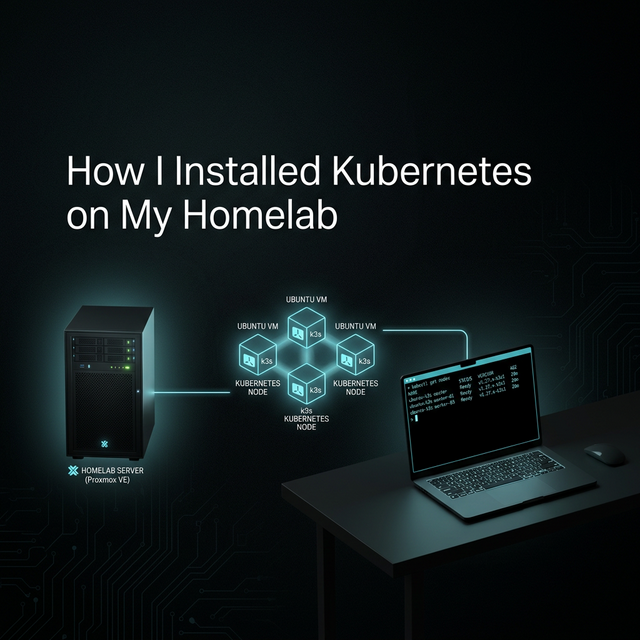
To make that happen, I deployed a Kubernetes cluster using k3s on an Ubuntu virtual machine hosted inside Proxmox VE.
This article walks through exactly how I did it, why each step matters, and what the setup gives me moving forward.
##My Starting Point: Virtualized Infrastructure
Before installing Kubernetes, I already had a virtualization environment running on Proxmox. Inside it, I created a virtual machine running Ubuntu. That VM would serve as my Kubernetes control plane node.
Using virtualization mirrors how real production environments operate. Cloud providers run Kubernetes on virtual infrastructure, not bare laptops. My Proxmox VM plays the same role as a cloud compute instance, giving me isolation, resource control, and the ability to snapshot or rebuild when needed.
##Why I Chose k3s
I wanted a Kubernetes distribution that felt real but did not demand heavy hardware or complex setup.
k3s was the perfect fit because:
- It is fully Kubernetes compliant
- It runs with minimal resource usage
- Installation is extremely fast
- It removes operational overhead while preserving core behavior
In practice, it provides a learning environment that behaves like a production cluster without the operational overhead of a full upstream Kubernetes deployment.
##Phase 1: Preparing the Ubuntu Server
Before installing Kubernetes, the operating system had to be configured correctly. Kubernetes is sensitive to host configuration, especially networking and memory management.
Static IP Configuration
During Ubuntu installation, I manually assigned a static IP address for:
- Subnet
- Address
- Gateway
- DNS
This IP becomes the Kubernetes API endpoint. If it changes, cluster access breaks. Production clusters rely on stable control plane endpoints, so I treated my homelab the same way.
Initial Server Setup
After installation, I connected via SSH and updated the system packages. I installed common administrative tools such as curl, git, vim, htop, and networking utilities. These support everyday server operations like monitoring, editing configs, and downloading resources.
sudo apt update && sudo apt upgrade -y
sudo apt install -y curl wget git vim htop net-tools
Proxmox Integration with QEMU Guest Agent
I installed the QEMU guest agent to improve communication between the VM and Proxmox. This allows the hypervisor to detect IP addresses, perform graceful shutdowns, and monitor the VM’s state more reliably.
sudo apt install -y qemu-guest-agent
sudo systemctl enable qemu-guest-agent
sudo systemctl start qemu-guest-agent
Network Validation
Before going further, I verified:
- The static IP was assigned correctly
- External network access worked
- DNS resolution worked
Kubernetes depends heavily on networking. If connectivity is unstable, cluster components fail in unpredictable ways.
ip addr show ens18
# Should show your static IP
Disabling Swap
Kubernetes requires swap to be disabled because it interferes with resource scheduling and memory guarantees. This is a standard requirement across production clusters, so I disabled swap and made the change persistent.
sudo swapoff -a
sudo sed -i '/ swap / s/^/#/' /etc/fstab

# Verify
free -h
# Swap should show 0
Hostname Configuration
I set the server hostname and mapped it in /etc/hosts so the system could resolve itself consistently. Stable node identity is important for certificates, networking, and cluster communication.
sudo hostnamectl set-hostname k3s-demo.localThen modify /etc/hosts file to map the hostname:
# Update /etc/hosts
sudo vim /etc/hosts

# Add this line
<SERVER IP> k3s-demo.local k3s-demo##Phase 2: Installing k3s
With the system prepared, I moved on to installing Kubernetes.
Pre-Installation Checks
Before running the installer, I confirmed:
- The required ports were free
- Enough RAM and CPU were available
- Sufficient disk space existed
This avoids conflicts and failed cluster startup.
# Check available ports
sudo ss -tulpn | grep -E ':(6443|10250)'

# Should return nothing (ports free)

# Check system resources
free -h  # Should show number of RAM
nproc    # Should show number of cores
df -h    # Should show plenty of disk space
Installing k3s
I installed k3s using the official script with three key options:
curl -sfL https://get.k3s.io | sh -s - \
  --write-kubeconfig-mode 644 \
  --disable traefik \
  --node-name k3s-demo
--write-kubeconfig-mode 644: Makes kubectl work without sudo--disable traefik: Default Traefik ingress disabled so I can manage ingress myself later--node-name: Explicit node name for clarity and future scaling
The installation completed in under a minute.
Verifying Cluster Health
After installation, I confirmed:
- The K3s service was running
- The node reported Ready
- System pods in the kube-system namespace were healthy
If anything fails, system logs provide detailed troubleshooting information.
# Check k3s service
sudo systemctl status k3s

# Should see: active (running)

# Check node
kubectl get nodes

# Expected output:
# NAME          STATUS   ROLES                  AGE   VERSION
# k3s-demo    Ready    control-plane,master   1m    v1.28.x

# Check all system pods
kubectl get pods -A

# Should see pods in kube-system namespace running
##Does k3s Have Only a Control Plane? What About Worker Nodes?
When I ran kubectl get nodes to see the nodes in my Kubernetes cluster, I only saw a control plane node.
That worried me a bit because from what I understood about Kubernetes, the control plane, which acts as the brain, is separate from worker nodes, where applications actually run.
I expected my setup to look something like this:
NAME              STATUS   ROLES           AGE   VERSION
control-plane-1   Ready    control-plane   1h    v1.28.x
worker-1          Ready    <none>          1h    v1.28.x
worker-2          Ready    <none>          1h    v1.28.x
worker-3          Ready    <none>          1h    v1.28.x
After digging deeper into k3s architecture, I discovered this behavior is intentional. In k3s, a single provisioned node acts as both the control plane and the worker node. It manages the cluster and runs workloads at the same time.
This design is perfect for development, testing, and pre-production environments, which is exactly what most homelabs are built for.
Still, that setup was not enough for me. I wanted the real experience of managing a cluster with a separate control plane and worker nodes. Thankfully, k3s supports adding worker nodes, and that is exactly what I did.
How to Add a Worker Node to k3s
To add a worker node, the first step is to retrieve the control plane token. This token is required to join a new node to the cluster.
On the control plane VM, run:
sudo cat /var/lib/rancher/k3s/server/node-tokenThe output will look something like this:
K10abc123def456g.....Next, I provisioned another VM, just like I did for the control plane. I disabled swap, installed the QEMU agent, and configured the necessary dependencies to prepare the VM for Kubernetes.
After that, I installed k3s in agent mode by running the following command on the new VM:
curl -sfL https://get.k3s.io | K3S_URL=https://<CONTROL_PLANE_IP> \
  K3S_TOKEN="K10abc123def456g......" \
  sh -
Here:
K3S_URLis the control plane IP addressK3S_TOKENis the token retrieved earlier
Finally, I verified that the worker node successfully joined the cluster by running the following command on the control plane VM:
kubectl get nodes
##Final Thoughts
Setting up Kubernetes yourself changes how you understand it. Instead of interacting with a managed black box, you see every layer that makes the platform work.
Running k3s on a Proxmox-hosted Ubuntu server gives me a controlled, production-like environment where I can experiment, break things, and learn deeply without risk.
For anyone serious about mastering Kubernetes, building your own cluster is one of the most valuable steps you can take.